Hello, I’m T.T. from the Workplace & IoT team in the Professional Services Department of the T&I Division. I primarily handle engineering duties for collaboration products and pre-sales activities.
Cisco has announced the “Room Bar BYOD,” an affordable BYOD solution for small meeting rooms and huddle spaces. This product is a USB-connected conference device that easily provides high-quality video and audio environments for meetings in small conference rooms or huddle rooms using business PCs. Today, we will introduce the convenience and key features of Room Bar BYOD through hands-on use, making it easy to understand.
Firstly: Benefits of General BYOD Device Adoption (improved web conference quality)
The primary purpose and benefit of implementing web conferencing is to enhance the quality of currently available BYOD devices, including those from other manufacturers.
Key Points for BYOD Devices
Connects to high-performance cameras, microphones, and speakers on BYOD devices, enabling high-quality video and audio for meetings.
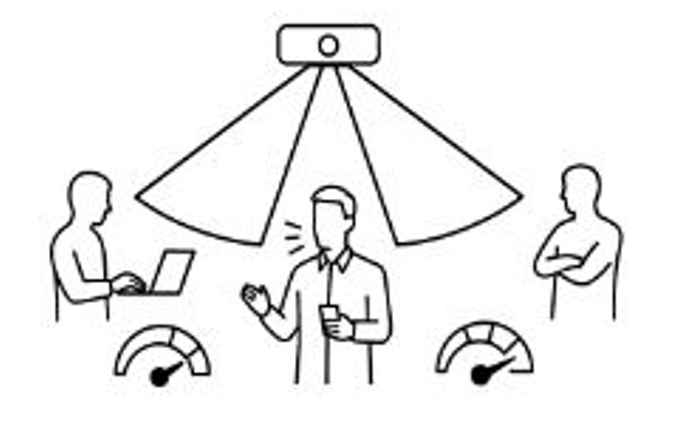
Speaker detection enables zoom and focus, while wide-angle video and noise cancellation create an immersive experience that makes you feel like you’re in the same space.
By controlling your PC directly, you can switch between materials and share screens smoothly. Additionally, you can use pre-prepared files and applications as-is, improving the quality of your presentations and demos.
Business PCs can be used as-is without requiring drivers, offering high compatibility with PCs for immediate use.
Since you use a PC, any web conferencing platform (Teams, Zoom, Webex, etc.) can be used.
In this blog, we’ll explain the unique advantages and extensive expansion features exclusive to the Cisco Room Bar BYOD solution that other companies don’t offer. Be sure to check it out!
Cisco Room Bar BYOD Configuration and Recommended Options
These are the product contents and cable options for the Cisco Room Bar BYOD. We also offer third-party products such as long USB cables and dedicated table stands, which we would like to introduce to you.
Product Configuration, Options, and Recommended Products
CAB-USBC-4M-GR=: USB-C(3.1) TYPE C 4M (For BYOD) CAB-PRES-2HDMI-GR=: HDMI 7.5M (Screen Sharing Cable) CAB-2HDMI-1.5M-GR=: HDMI 1.5M (Display Cable)
■Sanwa Supply USB Cable ※Recommended※
Model:KU-5GCCP75X0 ・Long USB-C Cable (One cable for both PC display and BYOD! Available in 7m and 5m lengths.) ※The Room Bar does not support USB PD power delivery output. It only provides 5W output.
■Ichinotsubo Workshop Table Stand ※Recommended※
Model:TCDS-WRBSTG ・A dedicated table stand product that can be placed flat on a desk without attaching to a monitor
Simple connection with a single USB-C cable The Room Bar connects to your PC with just one USB-C cable. The camera, microphone, and speaker are all integrated into one unit, so you can start using it right away with web conferencing tools like Zoom or Teams. No driver installation is required, providing a simple BYOD environment. ※The USB-C cannot supply power to the PC.
Installation and Setup of Cisco Room Bar BYOD
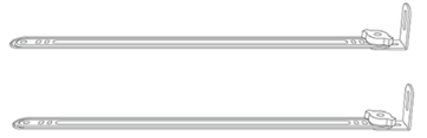
The Cisco Room Bar comes with a standard metal piece that serves as both a monitor mount and a wall mount.
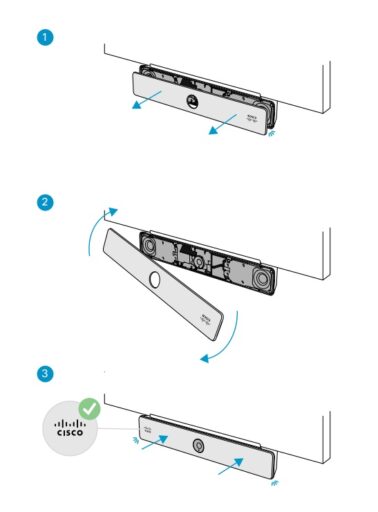
Monitor mounts can be installed in about 30 minutes to an hour. Let me explain the installation conditions and other details. It can be mounted on both the top and bottom of the monitor.
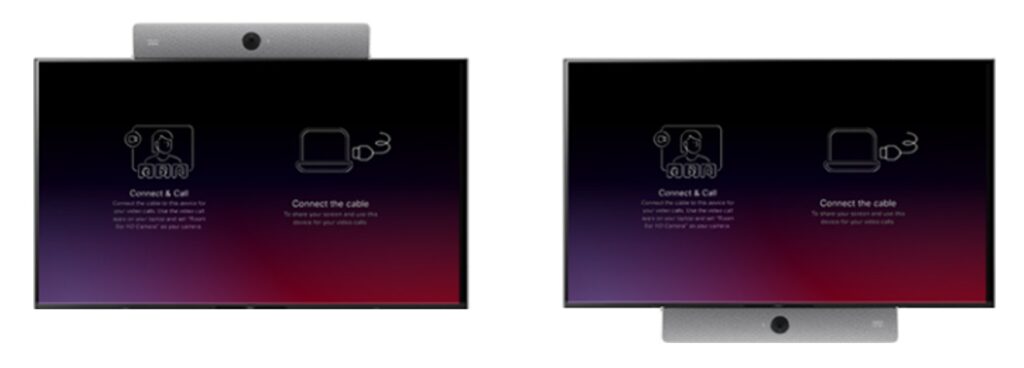
Monitor mount included! Can be mounted on top or bottom.
When attaching to the bottom, you can remove the cover and reposition the Cisco logo.
The following conditions must be met when mounting the monitor.
Conditions
Notes
The monitor must be wall-mountable (such as VESA-compatible monitors).
VESA mount compatibility is required.
The distance from the top or bottom of the monitor to the VESA mounting holes must be 40 cm or less.
※Generally cannot be installed on monitors 29 inches or smaller and 65 inches or larger.
For models under 29 inches, installation is possible using separate mounting accessories.
Monitors with a thickness of 85mm or less
Caution is required with older monitors.
Thin monitors require additional spacers.
The back of the monitor must not have significant protrusions or indentations (the surface up to the VESA mounting holes must be perfectly vertical for installation). ※See the figure below.
Uneven surfaces may interfere with metal fitting installation.
Cisco Room Bar BYOD Connection
When Connecting Easily Without a Network
Allows access to and use of the camera, speakers, and microphone from the PC
Displays the PC screen on the monitor.
AI noise cancellation and camera auto group framing
BYOD via USB and HDMI is possible, but USB-C is essential for convenient single-cable use. Additionally, by adding an HDMI cable, you can display videos from PCs that do not support USB-PD.
Connect to the Network for Enhanced Functionality
Using Wi-Fi connection enables Miracast “Wireless HDMI” for wireless Wi-Fi usage. By registering on Webex, you can add even more features.
Wireless guest sharing is possible (Paid Subscription License) ※A 30-day trial is available.
Visualization of utilization rates
Access to Power Management
Device control via the Webex app is possible
How to Use Cisco Room Bar BYOD
It’s easy to use. We’ll explain how to display your PC screen on the monitor and how to use it during web conferences (as a monitor display, camera, microphone, and speaker).
To display only the PC screen: By connecting a USB-C cable or HDMI cable on your desk to your PC, the screen will display.
When you want to use it as a camera, microphone, and speaker for web conferencing with screen display Connect the USB-C port on your desk, etc. Here we describe how to use it in Teams, but the process is similar for other web conferencing platforms. Please change your web conferencing camera, microphone, and speaker to “Room Bar Digital”.
When you set the camera to “Room Bar HD,” AI automatically displays an optimized image tailored to the number of participants, eliminating unnecessary space.
Microphone, Camera, and Speaker Performance of Room Bar BYOD
Built-in microphone The Room Bar BYOD incorporates a beamforming microphone with four microphone elements. The beamforming microphones have the following features:
①Captures the active speaker’s voice with pinpoint accuracy Beamforming technology allows the microphone to focus its sound reception toward the speaker. It clearly picks up only the necessary voices without being drowned out by surrounding noise, ensuring clear audio even during online meetings.
➁Comfortable anywhere with intelligent noise suppression You won’t have to worry about common meeting room noises like air conditioning or keyboard typing sounds. It intelligently suppresses surrounding noise and allows you to communicate comfortably without losing focus.
③The microphone picks up every word clearly, even when the speaker changes. In the conference room, speakers change one after another. Even in such situations, beamforming microphones are reliable. No matter who speaks, the microphone automatically detects the direction of sound and accurately picks up voices. Even when speaking while seated, audio remains consistently clear, making it perfect for discussion-style meetings with frequent speaker changes.
④High-quality sound ideal for voice recognition It also pairs exceptionally well with AI-powered meeting minute generation and voice recognition services. It provides clear audio with minimal noise, which also improves the accuracy of transcription.
2. Built-in Speaker and Camera
①Features two built-in full-range stereo round speakers A high-performance speaker that outputs sound from low to high frequencies using a single unit
➁ Wide-angle camera that clearly captures the entire conference room The Room Bar features a 15-megapixel camera with a 120-degree wide-angle lens. It clearly captures all participants, even in small meeting rooms. Even in small spaces, it provides a visual experience where you can instantly tell who is speaking.
③ Wide-angle lens with full-room coverage The Room Bar camera features a 120-degree wide-angle lens, allowing it to capture multiple participants in a conference room at once. Even when the speaker is fixed, it captures the entire scene, providing reassuring visuals for remote participants.
④ Footage remains stable with a consistent frame layout In BYOD mode, speaker switching and auto-tracking are disabled, and footage is displayed using a fixed frame layout. This maintains a stable screen layout without frequent image changes. It creates an environment where viewers can stay focused during presentations and discussions.
⑤High definition so every detail is sharp and clear The 15MP camera captures the entire room and displays only the necessary sections. It captures even the nuances of facial expressions. Even in BYOD mode, you can utilize the Room Bar’s camera and speaker via USB-C connection for video output from your PC, delivering a visual experience that stands apart from standard webcams.
Why We Recommend BYOD for Cisco Room Bar
Compared to other companies’ BYOD devices, this product offers high quality, superior design, at a low price. Here we will explain four major features that sets Cisco apart from other companies.
① Features NVIDIA’s Jetson chip. For details on Cisco and NVIDIA technologies, click here to visit the Cisco Blog.
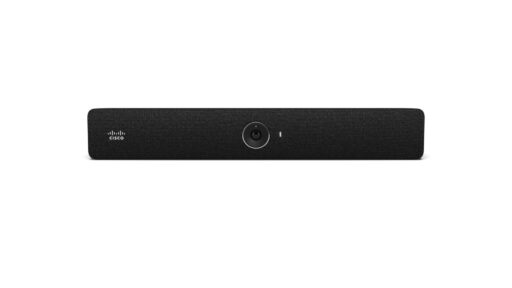
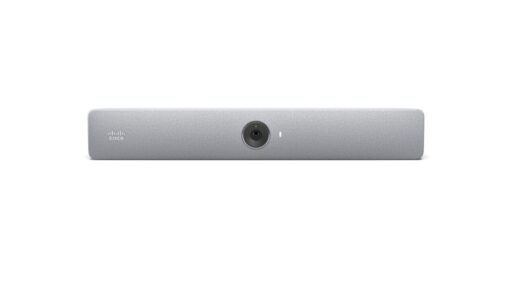
➁ Available in two colors to match your conference room design
Cisco Room Bar Carbon Black
Cisco Room Bar First Light
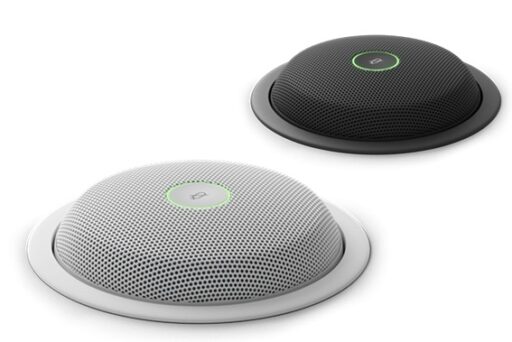
③ Extensive microphone expansion optionsWe want to use it in a slightly larger room! Sound quality is crucial! We want comfortable meetings where voices are even clearer! With Room Bar BYOD, you can add two additional microphones to the built-in microphone. Simply connect the additional microphone to use the extended microphone. It captures voices from the people speaking softly. Furthermore, the Microphone Pro model incorporates DSP, enabling optimal audio processing directly within the microphone itself.
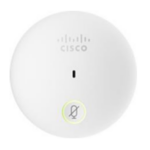
Cisco analog microphones can be added. Approximately 2-meter pickup range The bestselling product that delivers your voice exactly as it is By inserting the microphone, you can mute and unmute directly from the microphone. (During meetings, the microphone button will light up in red or blue.) ※Only one Cisco Table Microphone (analog microphone) may be added.
The Room Bar (BYOD configuration) can be used by connecting an advanced digital processing microphone with four built-in microphones to its PoE port. This microphone can connect to a maximum of one unit, with a pickup range of approximately 3 meters in radius.
Only one ** Cisco Table Microphone Pro (digital microphone)** can be added.
While compatible with the **Cisco Table Microphone (analog microphone)**, the Pro microphone alone provides sufficient audio pickup performance, so we recommend using the Pro microphone only.
Microphone Pro
Features Overview
Sound Pickup
Four microphone arrays capture voices from multiple directions in the conference room. They prioritize the speaker’s voice while suppressing surrounding noise.
Noise Reduction
Automatically reduces unwanted background noise (such as air conditioning sounds and noises).
Echo Cancellation
Prevents echoes and reverberation to maintain clear audio.
Automatic Gain Adjustment
Automatically adjusts the volume based on the speaker’s volume to a comfortable hearing level.
Items
Content
Microphone configuration
Four adjustable microphone beams
Sound Pickup Range
360-degree cardioid
AI features
Noise cancellation, audio processing
Connection Method
IP Connectivity (“plug-and-play” with Cisco video devices)
Installation Options
On the table, embedded, color selection (Arctic White/Carbon Black)
※If transitioning to Teams Rooms in the future, use of the Navigator (touch panel) will be required.
The Room Bar (BYOD configuration) has only one PoE port. However, two PoE power supplies are required: one for the Navigator and one for the Table Microphone Pro.
Thus,
Connect the Table Microphone Pro directly to the Room Bar
The Navigator requires the use of PoE-enabled equipment on the internal LAN or the addition of a PoE switch.
③ By adding the Navigator (Cisco touch panel), it can be used as a Teams Rooms or Webex device.
”When Upgrading Other Companies’ BYOD Devices to Teams Rooms”
Even for BYOD devices from other companies, you can enable Teams Rooms functionality by adding a MINIPC and a touch panel.
Room Bar BYOD can be easily converted into Teams Rooms by adding the Navigator and connecting to the network. ※A separate Microsoft® license for Teams Rooms is required.
When converting other companies’ BYOD devices into Teams Rooms, numerous cables are required, compromising maintainability and the room’s aesthetics. However, Cisco Room Bar BYOD offers the advantage of a simple, clean upgrade without requiring a PC, making it a cost-effective solution.
” When Upgrading Third-Party BYOD Devices to Teams Rooms” Additional equipment and recabling are required for the area marked in red. Additional power outlets are also required (two additional outlets are needed).
” When Upgrading Cisco Room Bar BYOD to Teams Rooms”
Simply add the Navigator, connect it to the network for Teams Rooms, and apply the license. The Navigator receives PoE power from the Room Bar BYOD, so no additional power outlet is required.
Finally
We hope you found the features and benefits of Room Bar BYOD informative. The product is currently available at a special promotional price.
Also, for customers using Cisco collaboration devices, we can provide demo units upon request.
NTT DOCOMO BUSINESS DATA will provide optimal products and services. Please feel free to contact us.